Monday, July 29, 2013

Doom Miniatures Part 11: Mancubus

Big, Fat, Ugly and Deadly!
It took me a long while to decide the scheme to work on this unit. I previously layer the the arms with Leadbelcher.
I start of by layering a base Ratskin Flesh.
The miniature is then layered with Steel Legion Drab to give it a darker hue.
A layer of Rakath Flesh is then added to give it a grey hue.

Finally, I added Mournfang Brown to give it a nice light brown base color.
Here I tested by washing with Light Seraphim Sepia which does not make very much different over brown base. I wash it again with Agarax Earthshade to give it a more detailed shadow on the pits and groves.
I then drybrush Ushbati Bone all over the model to give a greyer hue.
Finally, the mouthpiece is drybrushed with Pink Horror. The arm and back is recolored with Leadbelcher. The toes are colored with Ceramite White.

Only after painting, do I realised that I should have gone retro!
Probably the better color to use.

I might rework on of my units to this color. At least I know now how my cyberdemon is going to use.

Paint Used:
- Leadbelcher
- Base Ratskin Flesh
- Steel Legion Drab
- Rakath Flesh
- Light Seraphim Sepia
- Agarax Earthshade
- Drybrush Ushbati Bone
- Pink Horror
- Ceramite White

Next Step:
- Cyberdemon

Saturday, July 27, 2013

Doom Miniatures Part 10: Pinky Demon

Here doggy doggy doggy!
Deciding the color to use on Pinky was tough. I finally decided with the following method with 2 test possibilities.

Test 1:
Layer with Steel Legion Grab followed by drybrushing with Rakarth Flesh.

Test 2:
Layer with Rakarth Flesh followed by drybruahing with Steel Legion Grab.


Little difference in the shading, so both were washed with Agrax Earthshade.
Several test were done to add pink to the model. Finally, I have decided on drybrushing with a layer of Pink Horroro the body. The model is washed again with Agrax Earthshade to tone down the pink.
The teeth is washed with Carroburgh Crimson and a layer of Bloodletter was applied once the wash is dried.
The forelegs of the model is layerd with Mournfang Brown with Ulthuan Grey for the claw. The inner mouth is layered with Mephiston Red.
Forgot to add that the rear legs were layered with Leadbelcher and applied with either Nuln Oil or Agrax Earthshade.


Paint Used:
- Rakath Flesh
- Steel Legion Grab
- Mournfang Brown
- Mephiston Red
- Ulthuan Grey
- Leadbelcher
- Agrax Earthshade
- Nuln Oil
- Carroburg Crimson
- Bloodletter

Next Step:
- Mancubus, Cyberdemon

Doom Miniatures Part 9: Glazing

Forgot to pick up a pot yesterday: Averland Sunset.

Finally took some time out to test out the glazing effect.

Basically, glazing has a similar effect of wash except that instead of the grooves or recesses, glazes are meant for surfaces.


The first model I tested was the marines because of the bright and large surface area to test a good view of the glazing effect.

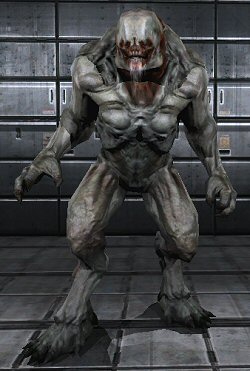
The second model I tested was the zombies on their shirts and pants. The green and blue models were a challenge to work with since they were using Krylon Camoflouge Black for primer. A small test were done on the zombies by adding small splotches of Bloodletter over the flesh  for added blood/bruising effect.


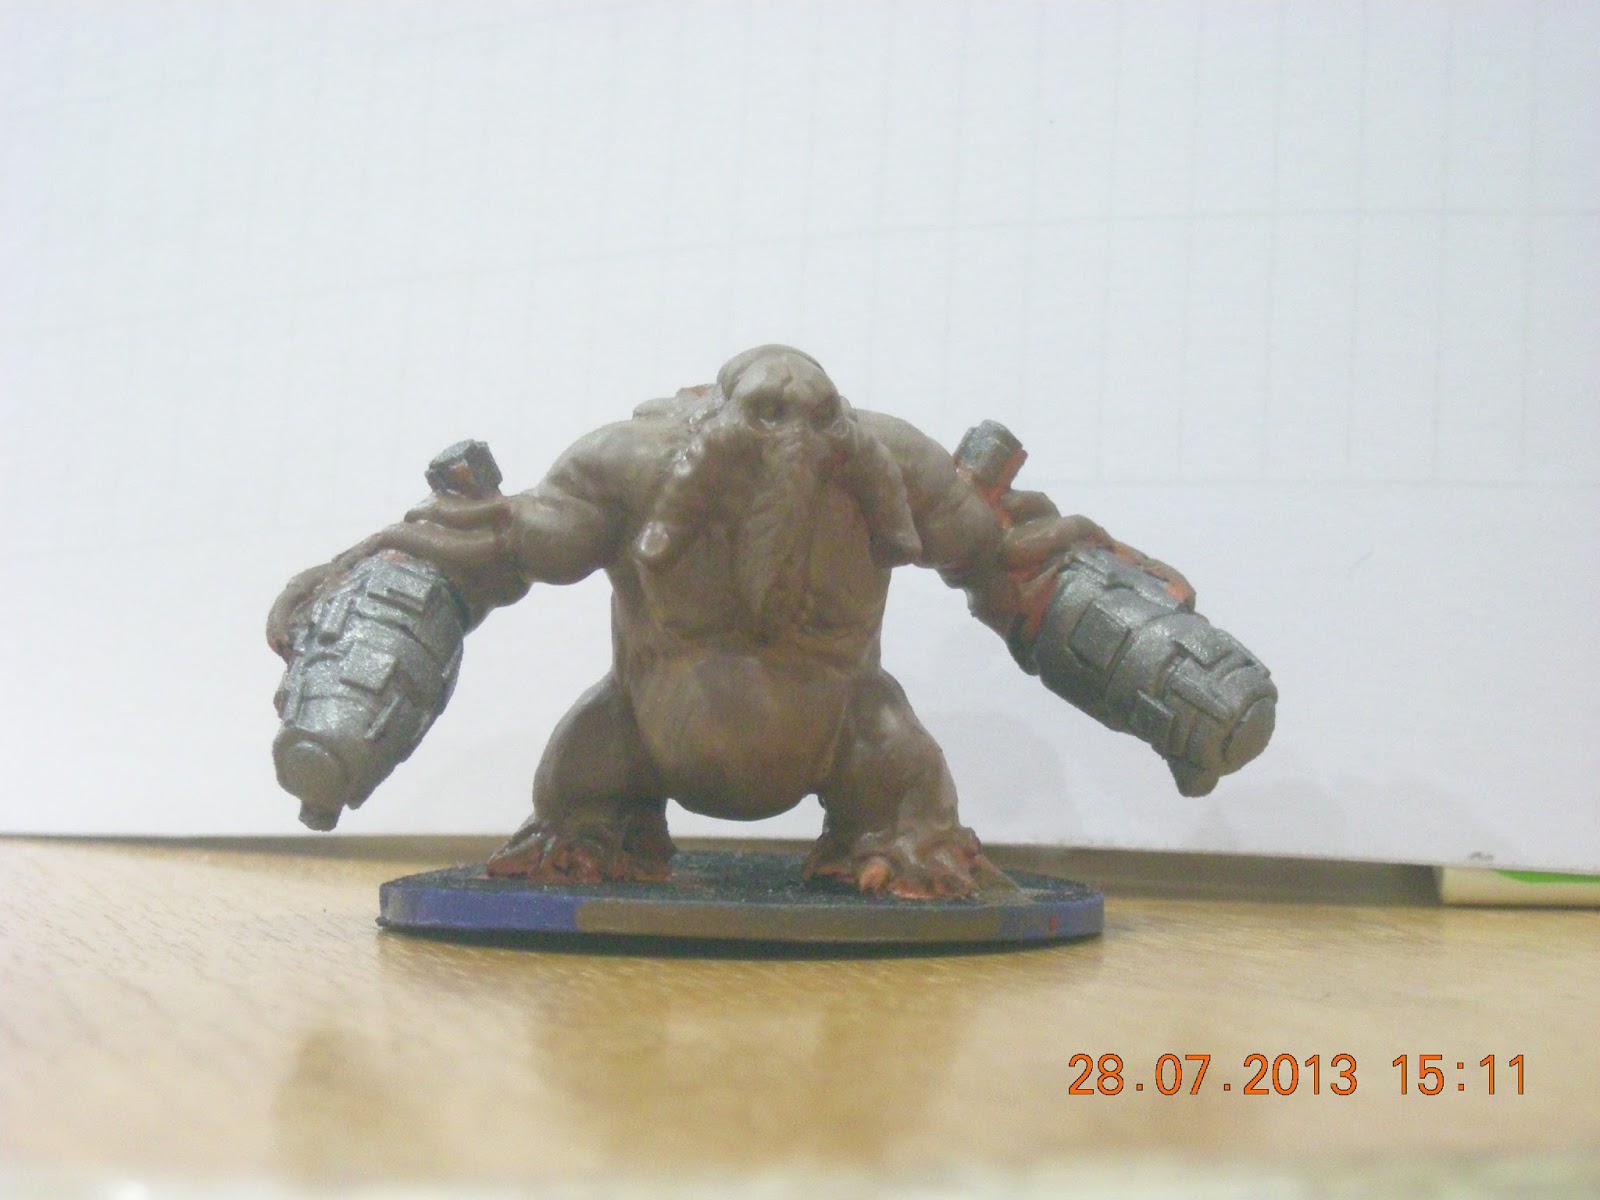
The third attempt were the trites. This creates a very different result as the glaze is applied on a dark surface. The result is very dull it is hard to tell the difference unless you are up close. Probably will not be using glaze over dark surface in the future.
The glaze, painted on the legs, are barely visible
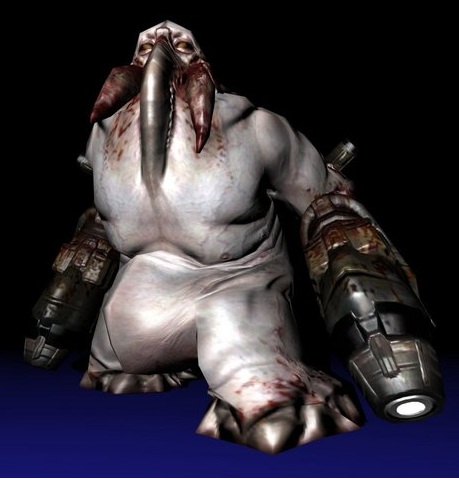
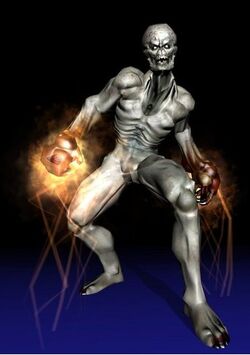
Finally a functional application by attempting to creating a fire effect on the arch-vile's hands.
Tough mix to create the effects when you have no idea what you are doing
A test layer of glaze is also applied on the arch-viles which has the same result as the trites due to the dark nature of the base colour.

Several attempts were made to create effects above. However, the formula used to create the effect above are as below:
- 1 layer of Averland Sunset from approximately between the hands and the elbows
- 1 layer of Flash Gitz Yellow on the palm and back of the hand
- 1 generous layer of Bloodletter

Among the failed result were:
- Glazing Lamenters Yellow directly over the previously red arms
- Drybrushing Averland Sunset and glazing with Lamenters Yellow
- Drybrushing Flash Gitz Yellow and glazing with Lamenters Yellow
- 1 layer Flash Gitz Yellow and glazing with Lamenters Yellow

Obviously using glaze for hues works best if when the base colour you are coating the glaze is not the same as the glaze itself. It also presents itself well over brighter surfaces.

Paint Used:
- Gulliman Blue
- Waywatcher Green
- Bloodleter
- Lamenters Yellow
- Averland Sunset
- Flash Gitz Yellow

Next Step:
- Pinky Demon

Thursday, July 25, 2013

Glazing Experiment Prologue

The army awaits
Just got myself some new paint pots and brushes today.
- Layers (Pink Horror, Flash Gitz Yellow)
- Glaze (Lamenters Yellow, Bloodletter, Gulliman Blue, Waywatcher Green)
- Technical (Liquid Green Stuff)
- Brush (Citadel Large Brush to replace my size 1 brush which is fraying, Citadel Fine Detail Brush to test against my size 00 brush)

I could not decide to get the Pink Horror layer or Changeling Pink dry compound for use on the demon (they are nicknamed Pinky for a reason). Another possible use of the layer would be on the cyberdemon. More experiments to come.

The yellows would be a test for the arch-vile. Just realised I forgot to get myself the Averland Sunset for drybrushing the arch-vile.

The glazes will be used on all the models to give them a little tinge of their color faction. Hopefully they will go well.

Liquid Green Stuff? I found a cheap F-14 which I intend to use as a test model for painting the Robotech  Tactics Miniature when they arrive.
F-14 for a test, Apache for fun!

Doom Miniatures Part 8: Trites


I have been having problems finding images for this little bugger until now. I have been googling for trikes all this while and looking at bike photos instead.

To start, they are separated into their color groups since they do not have a base to begin with. Some of those that I primed had to have some of the primer scratched off with a knife, just to get to their original color.

Once they are set aside, I began layering them with two light layers Mournfang Brown. Of course, you may need to skip painting a leg until much later.

The main body is then washed with Carroburg Crimson to accentuate the groves, eyes and thorax.

Legs are layered with a layer of Steel Legion Drab.

The body is drybrushed with Jokaero Orange.

Eyes and inner mouth color as based on team color.
The front.
Trikes inverted. Just realised they are faces.
From the rear.
Yes. I have yet to play Doom 3 itself on PC.


Paint Used:
- Mournfang Brown
- Carroburg Crimson
- Steel Legion Drab
- Jokaero Orange
- Mephiston Red
- Caliban Blue
- Macragge Blue

Next Step
- Glazing
- Pinky Demon, Mancubus, Cyberdemon

Doom Miniatures Part 7: Marines


They should have made this guy instead!
The marines are painted simultaneously over time with the other units are being painted due to their numbers (1 each for red, blue and green)
Red, as usual, being my primary test subject
Trousers of each unit is painted accordingly to each faction and washed with Nuln Oil to highlight the creases.

Backpack is painted using Mournfang Brown and washed with Nuln Oil to give it shadows.

Metal part of the shotgun is using Leadbelcher and washed with Nuln Oil. The handle is painted with Mournfang Brown.
Going slow. Green and Blue prior to washing
The face and arms was painted with Ratskin Flesh and a little drybrushing with Rakarth Flesh. A layer of wash of Agrax Earthshade is applied. Hair is painted with Abbadon Black.

Body armor and leg gear is layered with Celestra Grey and washed with Agarax Earthshade. Light drybrush with Ulthuan Grey.

Shoes are painted with Mournfang Brown and washed with Nuln Oil.
Marines to the front
Marines to the rear
You will probably notice the face has two color tone on the face as I had an accident attempting to add the white pupils for the eyes. Unfortunately, my arms were not steady enough for the job, which resulted in a layer of Ratskin Flesh and Agrax Eartshade wash to patch things up.

Here is also a case of over applying the wash as the pool over the face and the arms does ruin things to a certain degree.

 Paint used:
- Mephinston Red
- Caliban Green
- Macragge Blue
- Mournfang Brown
- Leadbelcher
- Ratskin Flesh
- Rakarth Flesh
- Agrax Earthshade
- Abbadon Black

Next Step:
- Glazing the vest
- Trites, Pinky Demon, Mancubus, Cyberdemon

Wednesday, July 24, 2013

Doom Miniatures Part 6: Zombies

Fat boys in da house!!!!!!

Ahh... Zombies... Everyone's favourite undead. Making this as authentic as possible is going to be a challenge.

For my zombies, I started by applying a very watered down layer of Steel Legion Drab on the face, arms and legs. A very watered down layer of  Celestra Grey is applied on the on entire miniature, including the areas painted above. The brown-grey did not turn out so well.

For the first time, I attempted to mix 5 part Celestra Grey and 1 part Mournfang Brown. The result pigment was then added with plenty of water and applied on the face, arms and legs.


A slightly yellowish-brown skin tone was the result. Carroburgh Crimson is then used to highlight the indentations on the body (open wounds and stomach lines). The shirt is entirely washed with a good layer of Nuln Oil. The head, hands and feet washed is then washed with a light layer of Agrax Earthshade to add a little tone.


I just added a small dot of Ceramite White to create the effect of the eyes as inspired by the image on the top of this page.
I obviously still need more practice when handling very minute details.
Paint Used:
- Steel Legion Drab
- Celestra Grey
- Mixture of 5 part Celestra Grey  and 1 part Mournfang Brown
- Carroburg Crimson
- Nuln Oil
- Agrax Earthshade
- Ceramite White

Next Step:
-  Possibly glazing the shirts and pants each with either Waywatcher Green, Gulliman Blue or Bloodletter
- Marines, Trites, Pinky Demon, Mancubus, Cyberdemon

Tuesday, July 23, 2013

Doom Miniatures Part 5: Arch-Viles

Arch-Vile from Doom 3
While I would love to create a replica of Doom 3's Arch-Vile, I am biased to the design in Doom 2.
It ain't pushovers if you ever meet them
To start with the job, a layer of diluted layer of Ratskin Flesh is applied. The unit is then washed with with Carroburgh Crimson and left to dry. It is then drybrushed with a Ushbati Bone.
From Left: After Drybrushing, After Washing, After Base Layer


In an attempt to create the flaming hands effect, I applied a wet layer of Mephiston Red followed by wet layer Mephiston Red mixed with Jokaero Orange. As the arms are not completed yet, I am planning to glaze a layer of Lamenters Yellow once I have gotten it.

As for the eyes, a layer of Abbadon Black is applied to create the eye socket depth. It is then doted with Mephiston Red.
Come to Papa!
An interesting observation is the effect of using Krylon's Camouflage Black. The dotted texture of the miniature which occurred when using the paint as a primer (especially at the legs) seems to cause difficulty for the wash to create the shadow effects on the ribs and such. Not sure if the bumps are feature of the paint itself or a problem cause from the priming process as I have read that not shaking the can well during spraying can cause a spotty finish (ref: How to Paint Citadel Miniatures page 16). The bumps are creating a capillary effect which runs the paint all over. This is probably good in basing, but not ideal for washing. Back to using Bosny Blackboard black in my future minis.

Paint Used:
- Ratskin Flesh
- Carroburgh Crimson
- Ushbati Bone
- Abbadon Black
- Mephiston Red
- Jokaero Orange

Next Step:
- Get Lamenters Yellow to glaze the arms
- Zombies, Marines, Trites, Pinky Demon, Mancubus, Cyberdemon

Thursday, July 18, 2013

Doom Miniatures Part 4: Hell Knights

Added 3 new paints to the list: Jokaero Orange, Ratskin Flesh and Celestra Grey.

There were plenty if sample images for hell knights in the Internet. Unfortunately, I did not quite like the pale green design which was suppose to be based from the game and decided to head towards brown to make it more organic.

3 combination base colors were tested for the hell knight.

Test 1
2 layers Jokaero Orange base was applied followed by a layer of Ratskin Flesh. Very little difference in layering result. A layer of Mournfang Brown is then painted over to give a brown with a hint of orange texture underneath. The unit is then washed generously with Agrax Earthshade. Not much difference. Washed again with Carroburg Crimson. Darker complexion which looks just nice.

Test 2
2 layer of Jokaero Orange followed by a layer of Mournfang Brown. Not much difference compared to previous result. Wash with Carroburg Crimson.
Test result 1 and 2 before applying Mournfang Brown. Almost no difference.
Before and after applying Mournfang Brown. The spots of orange on the left unit was a nice surprise
Test 3
2 layer of Mournfang Brown applied instead. Followed by a wash of Carroburg Crimson. Forgot to take comparison photo

Unit 1 and 2 had the texture which brighten up the brown layer well if compared to unit 3.
The other 3 units are painted via test 2 method. Each unit is then drybrushed with Rakarth Flesh. The eyes are dotted using toothpicks with Mephiston Red. Leg claws are painted with Celestra Grey.
Hell's army
End result with flash
Without flash
A note about washing.
1. Wait till your paint is really dry. Wash and base paint will mix and ruin the wash.
2. Going crazy with wash does not mean slapping a big blob of it. It still runs and drips. If the recess does not darken as desired, apply another layer.

Need to toy around with camera exposure and distance to get better effect and clarity.

Paint used:
- Jokaero Orange
- Mournfang Brown
- Carroburg Crimson
- Rakarth Flesh
- Mephiston Red
- Celestra Grey

Next Step:
- Repainting the base
- To glaze or not to glaze, that is the question
- Get Yellow/Orange for arch-vile flame
- Arch-Vile, Zombies, Marines, Trites, Pinky Demon, Mancubus, Cyberdemon

Tuesday, July 16, 2013

Doom Miniatures Part 3: New Primer, Blue and Green Imps

Finally got myself Krylon Camouflage Black to test the adhesiveness of the paint itself. I found it to be much better then my previous primer, although there is still chance for the paint to peel off.

The second test was to see if the Citadel paints is able to paint on Krylon primer. And it does work very well.

Once the units are primed, the base is lined using Caliban Green and Macragge Blue. The demon and cyberdemon is then painted using Leadbelcher exactly the same as previously done.
Green vs Blue without the trikes, zombies and arch-fiends


Demon rear legs painted
Cyberdemon painted

Cyberdemon closeup. Mouthpiece and eyes to add Mephiston Red later
The three marines. Blue and Green yet to be washed

Since I have nailed the imps earlier, I decided to move on and work with them right away. The steps were the same: Mournfang Brown base, Nuln Oil wash and Steel Legion Drab drybrush. Obviously something was missing as the final result under bright light differ by a mile from what I had earlier.
Red: The original work
 
 
Further work in an attempt to create the same tone as the red units was performed by rewashing the unit with Nuln Oil followed by a drybrush layer of Mournfang Brown and Steel Legion Drab.
Blue and Green after rewash
Green after second drybrushing layers
Blue after second drybrushing layers

Bad move apparently. I will probably leave it at that.
Blue after second drybrush layers taken without flash

Colors used:
- Macragge Blue
- Caliban Green
- Leadbelcher
- Mournfang Brown
- Mephiston Red
- Nuln Oil
- Steel Legion Drab

Next step:
- Base lining the zombies and arch-fiends
- New paints needed