Showing posts with label UEDF. Show all posts

Wednesday, June 10, 2015

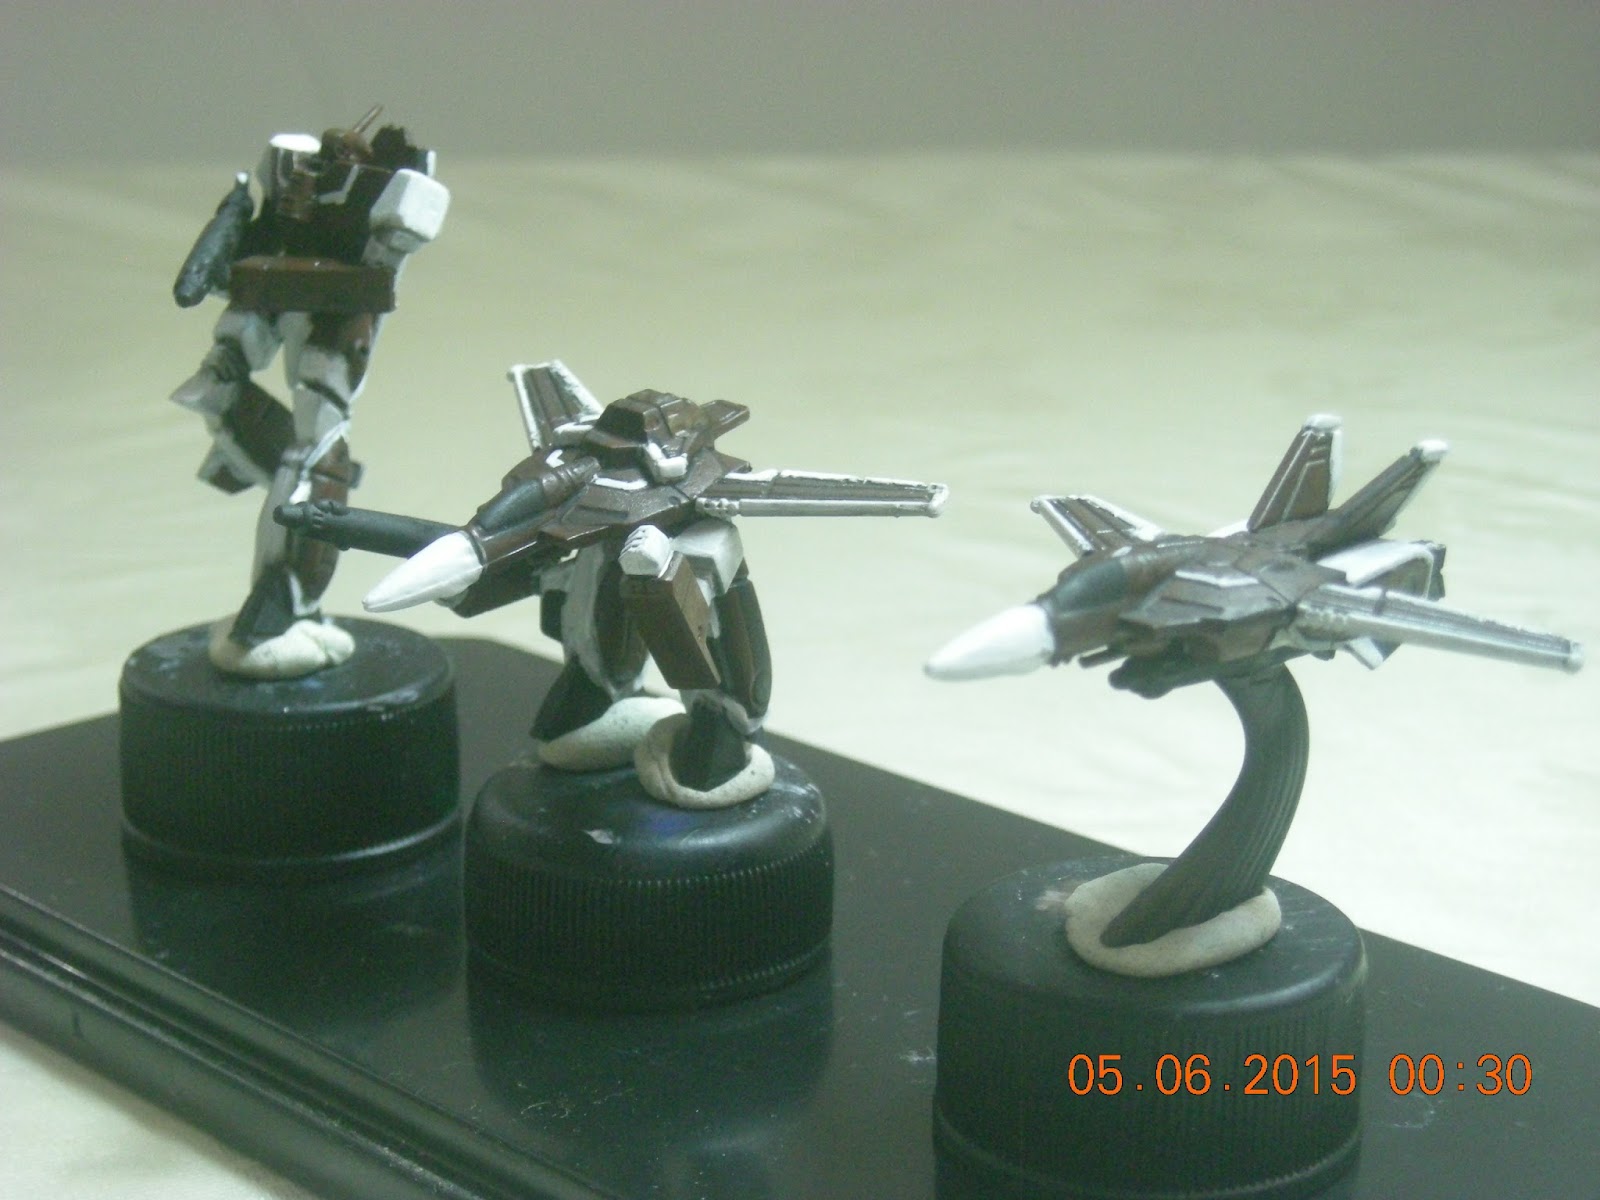
Robotech Tactics: VF-1J Miriya and VF-1A Production Model

It is always great when things fall as per scheduled.
Completed VF-1J Miriya and VF-1A Production Model

VF-1J Miriya


Battloid close up
 
 
Reds were Mephiston Red->Evil Sunz Scarlet. Whites are Vallejo Model Air white.

VF-1A Production Model


Battloid close up
 
 
Brown is Mournfang Brown->1:1 Mournfang Brown:Steel Legion Drab


Just to add, Max Blue were Macragge Blue->Calgar Blue

Monday, June 08, 2015

Robotech Tactis: VF-1J Max Sterling

Got this model completed over the week. My test model since there are quite a lot of reference for him, although I probably should have completed the production VF-1A which I left hanging in the first place.


These models above were before decals were applied. I was initially thinking of just leaving them as that, but they just do not look right. I am glad I did and I have to say, the decals were a pain to apply as much as fixing up the Veritechs in guardian mode.

VF-1J Max in Battloid mode
 
 
The white certainly needs further improvement. Probably due to the fact that my Ceramite and White Scar was drying up after not being in used a long time. Then again, there were like powdery in the first place when I got them. I am probably lucky that I could use up almost the entire pot.

VF-1J Max in Gerwalk/Guardian mode
 
 
I can honestly say I did not like the stand they provided. It is two big and bulky. I used these extra spares from my Tau drones from my Farsight Eight earlier. They certainly look much better.

VF-1J Max in Valkryie/Fighter mode


I have to admit, painting these models now got me itching to get the larger models, either from Yamato, Bandai or Toynami. I am still gonna get myself a VF-1S Skull One from Takatoku which I had as a kid.

Anyway, next in line to finish is the VF-1A Production model which was left hanging since I washed it. Hopefully it will be done tomorrow in Wira.
 
 
I am still undecided if I should leave it this brown or brighten it as the original colour is much brighter than this.

VF-1J Miriya should be next after this followed by the rest of my VF-1As.
Here is a preview.
Just in case you are wondering from the top left,
- VF-1S Deathwing colours
- VF-1J Miriya
- 2 VF-1R still undecided on the colour. Probably Ravenwing colours
- VF-1A Greenwing
- VF-1A Miriya
- VF-1A Max
- VF-1A undecided.Originally intended to be Rick Hunter/Hikaru's colour until I realise that Miriya's 1A is quite identical. Honestly, I don't think Miriya even piloted 1As in the series. I might just make another Greenwing out of this.

The black bunch on the lower left are all the destroids. Still have not decided on the colour
Only the VF-1S and 1R have missiles attached to which I need to stress that they are a bloody pain to apply. The pieces on the bottom are the long range missiles which were intendeed for the VF-1S to which I had countless problems getting them attached since I primed the model prior to glueing them. Surprisingly, the VF-1Rs stayed while the once for VF-1S (6 on each Valkryie and Gerwalk mode) kept falling off even after I stripped the paint of the wings. Finally decided to just use the a pair of MLOP and a pair of standard missile on them. The rest? Do I recall any of the VFs in Robotech or Macross having missiles? No. Besides, it is kinda weird that the missiles should disappear the moment they transform to Battloid mode. So no. I will not be putting any missiles for most of them especially since I will very unlikely be joining any tournaments (also since my model's colour are not exactly in uniform for tournaments). So yeah, no missiles for me.

Tuesday, November 11, 2014

Robotech Tactics: Valkyrie Fighter Part 2 WIP

Just a pictorial on what happened so far.

The first VF-1A will be based on the mass production build.
The model have a Mournfang Brown and Ceramite White basecoat over the parts seen above.
I then wash them with Nuln Oil to bring out the grooves and shadows better.

Due to the size, this mini is certainly a tough one to paint. Hopefully they turn out well in the end.

Thursday, November 06, 2014

Robotech Tactics: Valkyrie Fighter

Since Robotech Tactics began shipping, countless international backers are waiting for their products. It sometimes is a downer (for lack of a polite word) if you are not in the US. I could not wait to get my hands my pledge so I did the next best thing, purchase off another backer. A shout out to Josh who was selling his over at the Robotech Tactics group on Facebook. If you are a fan or a backer, I do suggest joining this group as they have plenty of informative stuff you need to know prior to assembling these models, especially if you made loose purchases like me without any guides. https://www.facebook.com/groups/1440349382851175/

Some key things notes from my observation and probably bias comments (based on my experience with Bandai and GW models).
- The models are very small! While there are many size comparison shots take on the group, it did not hit me until I started assembling the Guardian and Battloid mode.
- Details on the models are no doubt very detailed. However, some of the details, in my opinion may be unnecessary, such as the grip of the GU-11 gunpod for the Veritech mode. It is going into the slot if you are assembling it, hence I do not think the details of the handle on it is required. It is like the each parts are modeled separately prior to the final sculpture.
- Assembling can be a pain for the Battloid and Guardian mode especially the arms. The arm assembly for my Guardian mode is a little odd. Probably because of my order of assembly.
- Check out Peter Nolan's image file in the group for exact arm-hand-gun joint combination to use. Very important if you are going 2 handed on the gunpod.
- Veritech Mode: Easy assembly and very straight forward. A little attention need to be given to the tail fins since the tabs and groove for them are very small.
- Guardian Mode: Made a mistake of assembling the body and wings first. Wings, for this mode, should be the last thing to go in. Which probably resulted in the very odd angle of my arms. Some cutting of the stub will be required to put the arms at a better angle in future builds.
- Battloid Mode: Body and torso comes in 3 separate pieces: front, back and lower. This gives the ability for the model to turn. However, I find it a waste that the canopy of the model is a separate piece to assemble. I do not see any reason for that. Legs are joined via ball-socket method. Arms, like the Battloid mode, via stubs.
- GU-11 gunpod alignment. I am not sure of many are having this problem as I do where the hand does not go well with the arm as the fin of the gun is somehow preventing the hands to be pieced correctly. However, I found that the GU-11 on my Guardian have a groove, which I assume is how they intend to GU-11 to rest on the arm as pictured below.
Arm stub clearly visible. Not sure how deep it should be going in.
- Tweezers are your best friend here.
- I might just ditch the provided stand. It is too think for my liking, especially for the guardian. A third leg anyone?
- It would have been great if there is a consistency on the sprue design. The sprues I got consist of 7 sprues. 2 each for both Veritech and Guardian Mode. 1 for both Battloids. I will need to wait and see if the expansion will be having 2 separate sprue for each Battloid in the box. (check out the sprues itself in the page link above!)

At the end of the day, I am glad that I got my hands on these. Now to wait for my actual package to arrive in.